Add a Data Source to vMix for Esports
Open vMix
- Launch vMix on your system.
Access Data Sources
- In the vMix interface, locate the Settings button (gear icon) in the bottom right corner.
- Click Settings, then navigate to the Data Sources tab.
Add a New Data Source
- In the Data Sources window, click the Add button.
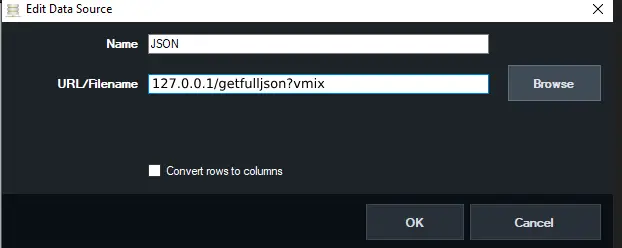
- Select Web Browser or JSON as the data source type, depending on your setup. (For this endpoint, JSON is typically used since the endpoint provides JSON data.)

Configure the Data Source
- Name: Enter a descriptive name for the data source (e.g., “Esports Dashboard”).
- URL: Input the endpoint URL:
http://127.0.0.1:8080/getfulljson?vmix. - Update Interval: Set the refresh rate (e.g., 1-3 seconds would be the recommended time).
- Ensure the Enable checkbox is selected to activate the data source.
Test the Connection
- Click OK to save the data source.
- Verify the data is being pulled correctly by checking the Data Sources panel in vMix. You should see the JSON data from the endpoint.
Link to Titles or Graphics
- Open the title or graphic in vMix where you want to display the esports data (e.g., scores, player stats).
- In the title editor, select the text field or element you want to link.
- Use the Data Source dropdown to select your newly created “Esports Dashboard” data source.
- Map specific JSON fields (e.g.,
score,player_name) to the corresponding text or graphic elements.
Preview and Adjust
- Preview the title in vMix to ensure the data populates correctly.
- Adjust formatting, positioning, or refresh rates as needed for smooth display during the esports event.
Save and Go Live
- Save your vMix project.
- Add the title to your vMix input and go live with your esports dashboard.
⚠️
Important Notes:
- Ensure the endpoint (
127.0.0.1:8080/getfulljson?vmix) is accessible and running during your broadcast. - The endpoint must be accessible from the machine running vMix; check firewall settings if necessary.
Last updated on